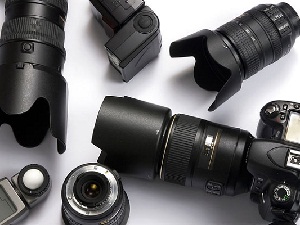
Guide to Photography
Professionals photographers have years of training and experience and often this comes with a price. Product shots and corporate portraits are costly and time consuming, but the advancement of digital photography and point and shoot cameras, has made taking good photos for the average user, easier than it used to be. So if hiring a professional photographer is not possible, and you want to have a go yourself, then follow the tips below, and you will be taking great useable photos in know time.
Top Tips to Taking a Great Photo
-
Center your image – when looking through then lens, focus on your target to the centre of your screen. Be aware of chopping off heads and having too much space above and below your target. Try and get the target in the centre of your screen.
-
Be aware of the background and foreground – remove unsightly distractions from your background or foreground. Look behind your target and make sure nothing visually stands out like a chair or bin, or car if outside. Where possible, use plain or scenic backgrounds, so they don’t distract from what you want your photo to focus on.
-
Lighting – always ensure you have sufficient lighting conditions when taking photos. If indoors, use a flash or have your targets in as much natural light as possible.
Tips for Photo Editing
Photo editing programs like Adobe Photoshop are usually reserved for skilled professional photographers and graphic artists; however there are many simplified photo editing programs available for the amateur user. A very easy to use program that comes with Microsoft Office is Microsoft Office Picture Manager. You can easily resize, compress, crop, lighten, darken, fix red eye and alter the colour of your photos using this program. Below is some simple tips to help you get started –
-
To crop your image – Once your image is open in the program, click ‘Edit Pictures’ on the tool bar. On the right hand side click ‘Crop’. You can either drag the corners of the image to the size you want or you can use the crop settings. Click okay to see the results. Use the reverse arrows to undo any move you do not like. Save as normal.
-
To resize your image – Click the ‘Edit Picture’ tab again and on the right hand side click on ‘resize’. Here you can enter the specific size you want your image to be, or you can choose from a predefined size based on whether the image is to be used in a document, on the web, or in an email. The old and new size of the image is shown in pixels below.
-
Compress Picture – Often you may need to adjust the actual file size of your image, particularly for web images. Click the ‘Edit Picture’ tab again and on the right hand side click ‘Compress Picture’. Select the appropriate predefined size and press ‘ok’. Note – if you are want to reduce the actual image size and the compression of an image, make sure you adjust the image size first then compress the image; otherwise your image may loss visual quality and pixelate.
-
Brightness and Contrast – Click the ‘Edit Picture’ tab again and on the right hand side click ‘Brightness and Contrast’. You can use the auto button to adjust the brightness or use the sliders below to adjust the brightness/darkness, contrast (intensity) and mid tones. The mid tone adjusts the shadows rather than the overall picture. This is good to use if you just need to lighten the shadows in your image. Always adjust the contrast after any lighting adjustment.
-
Colour Adjustment - Click the ‘Edit Picture’ tab again and on the right hand side click ‘Colour’. Use either the ‘Auto Adjust’ colour tab or the sliders below to adjust the colour of your image.
-
Auto Correct – Next to the ‘Edit Picture’ tab, there is ‘Auto Correct’. Use this to automatically adjust your images brightness, contrast and colour.
-
Red Eye Removal - Click the ‘Edit Picture’ tab again and on the right hand side click ‘Red Eye Removal’. Using the mouse, place the circle cursor over each of the red eyes in your image and click on them. When you’re finished click the ‘Ok’ button. You can also reset it if you make an error.
-
Flip and Rotate – Click the ‘Edit Picture’ tab again and on the right hand side click ‘Flip and Rotate’. Use the side buttons to adjust your image as required.